However, in some instances, the actual requirement of the cores might not be in sync with what the OS thinks is the right number. As a result of which, the task that you currently executing might be slow and laggy. Fortunately, we do have the option to manually enable the required number of cores when a particular task is in progress. When you do so, the workload will now be divided among more cores, and this should translate to a better and improved CPU performance. So with that in mind, this guide will show you how to enable all the CPU cores on your Windows 11 PC. Follow along.
How to Enable All CPU Cores in Windows 11
The first three steps are the prerequisites, so make sure to checkmark them off the list. After that, you may start off with the instructions to enable all the corers, which are given in STEP 4.
STEP 1: Boot Windows 11 to BIOS
STEP 2: Enable Multi-Core Support in BIOS
Next up, you will have to instruct your BIOS to use all the logical cores present in the CPU. So from the BIOS screen, go to the Multi-Core Support option and select All.
STEP 3: Enable HyperThreading
Intel’s Hyper-Threading Technology allows more than one thread to run on each core. More threads would translate to the ability to do more work in parallel. This means that one physical core now works like two “logical cores” that can handle different software threads. So from the BIOS menu, look for the HyperThreading settings and then choose Enable.
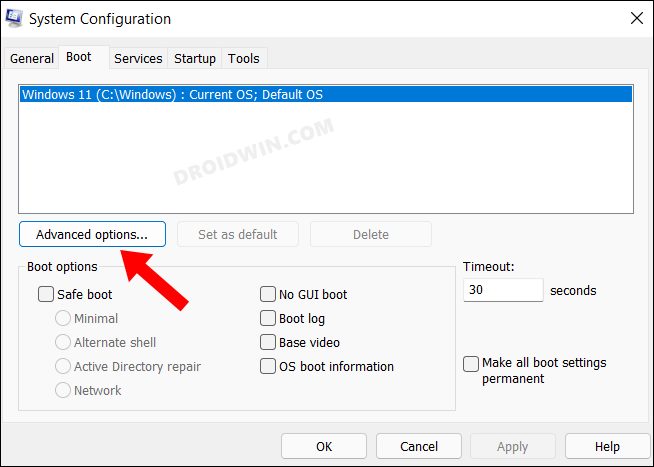
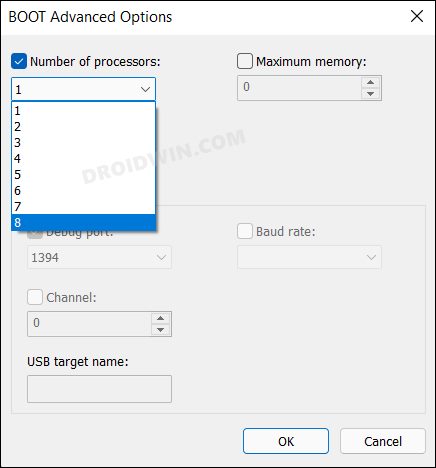
STEP 4: Enable All CPU Cores
Now that we are done with the prerequisites, it’s time to enable all the cores on your Windows 11 PC. So refer to the below instruction steps:
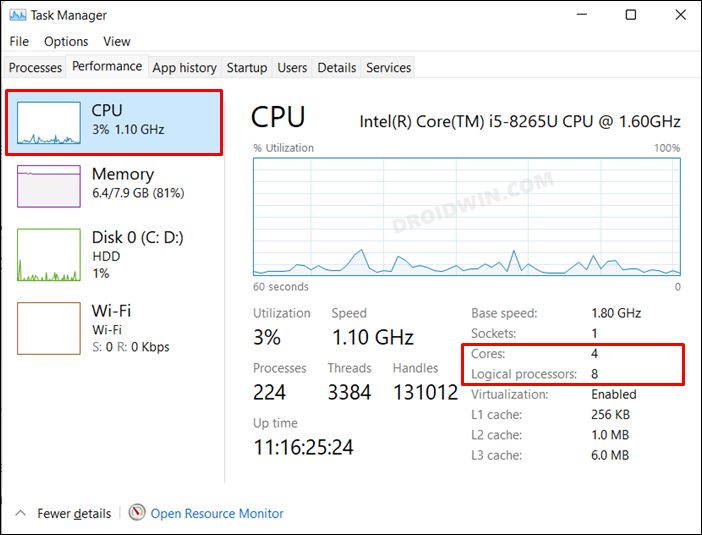
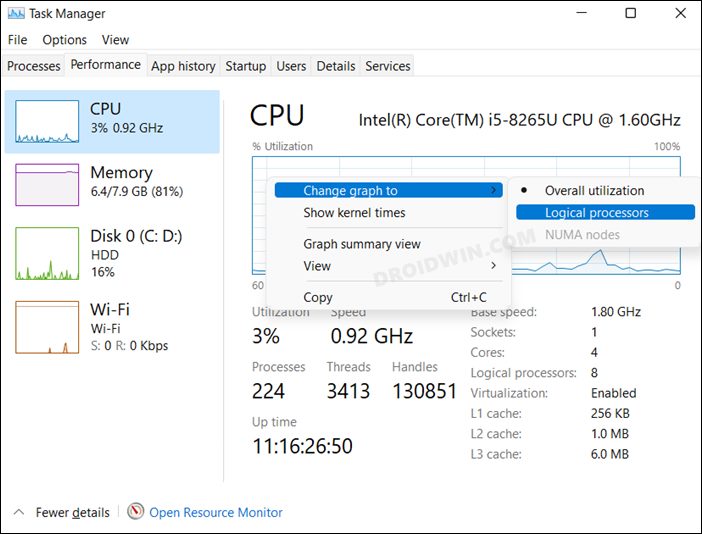
How to Check Number of Enabled Cores in Windows 11
You could easily check the total number of cores that are currently enabled as well as the utilization graph of each of these cores from the Task Manager. Here’s how That’s it. These were the steps to enable all the CPU cores on your Windows 11 PC. Likewise, we have also listed out the steps to check the total number of logical cores enabled at a particular point in time as well as their utilization stats. If you have any queries concerning the aforementioned steps, do let us know in the comments. We will get back to you with a solution at the earliest.
How to Reset BIOS in Windows 11How to Fix Windows 11 High CPU and Disk UsageDesktop Window Manager dwm.exe Consumes High CPU/Memory [Fixed]Antimalware Service Executable High CPU/Memory Usage: How to Fix
About Chief Editor